Tokenize It! Creation and Distribution of Tokens on Ethereum.
Sell yourself - but not below value!
This technical guide shows how to create your own Personal Token, provide liquidity for it and transform it into an asset with Fixed Product Automated Market Making using Uniswap v2.
Create your Personal Token
As we want to keep this as short and easy as possible, we chose a ready-made solution. If you want to learn more about Token creation on Ethereum, head over to ethereum.org/build.
Prerequisites
- Installed MetaMask
- Some rETH (Rinkeby ETH) from the Rinkeby faucet
Create the ERC-20 Token on Rinkeby

- Visit TokenMint
- Choose ERC-20
Name:     Your Super Token
Symbol:   YST
Supply:   1000000
Decimals: 2
- Confirm Token creation, note down Token contract address

- Add “rinkeby.” to the link displayed in the result page. This will lead you to the Etherscan Token Contract creation transaction.
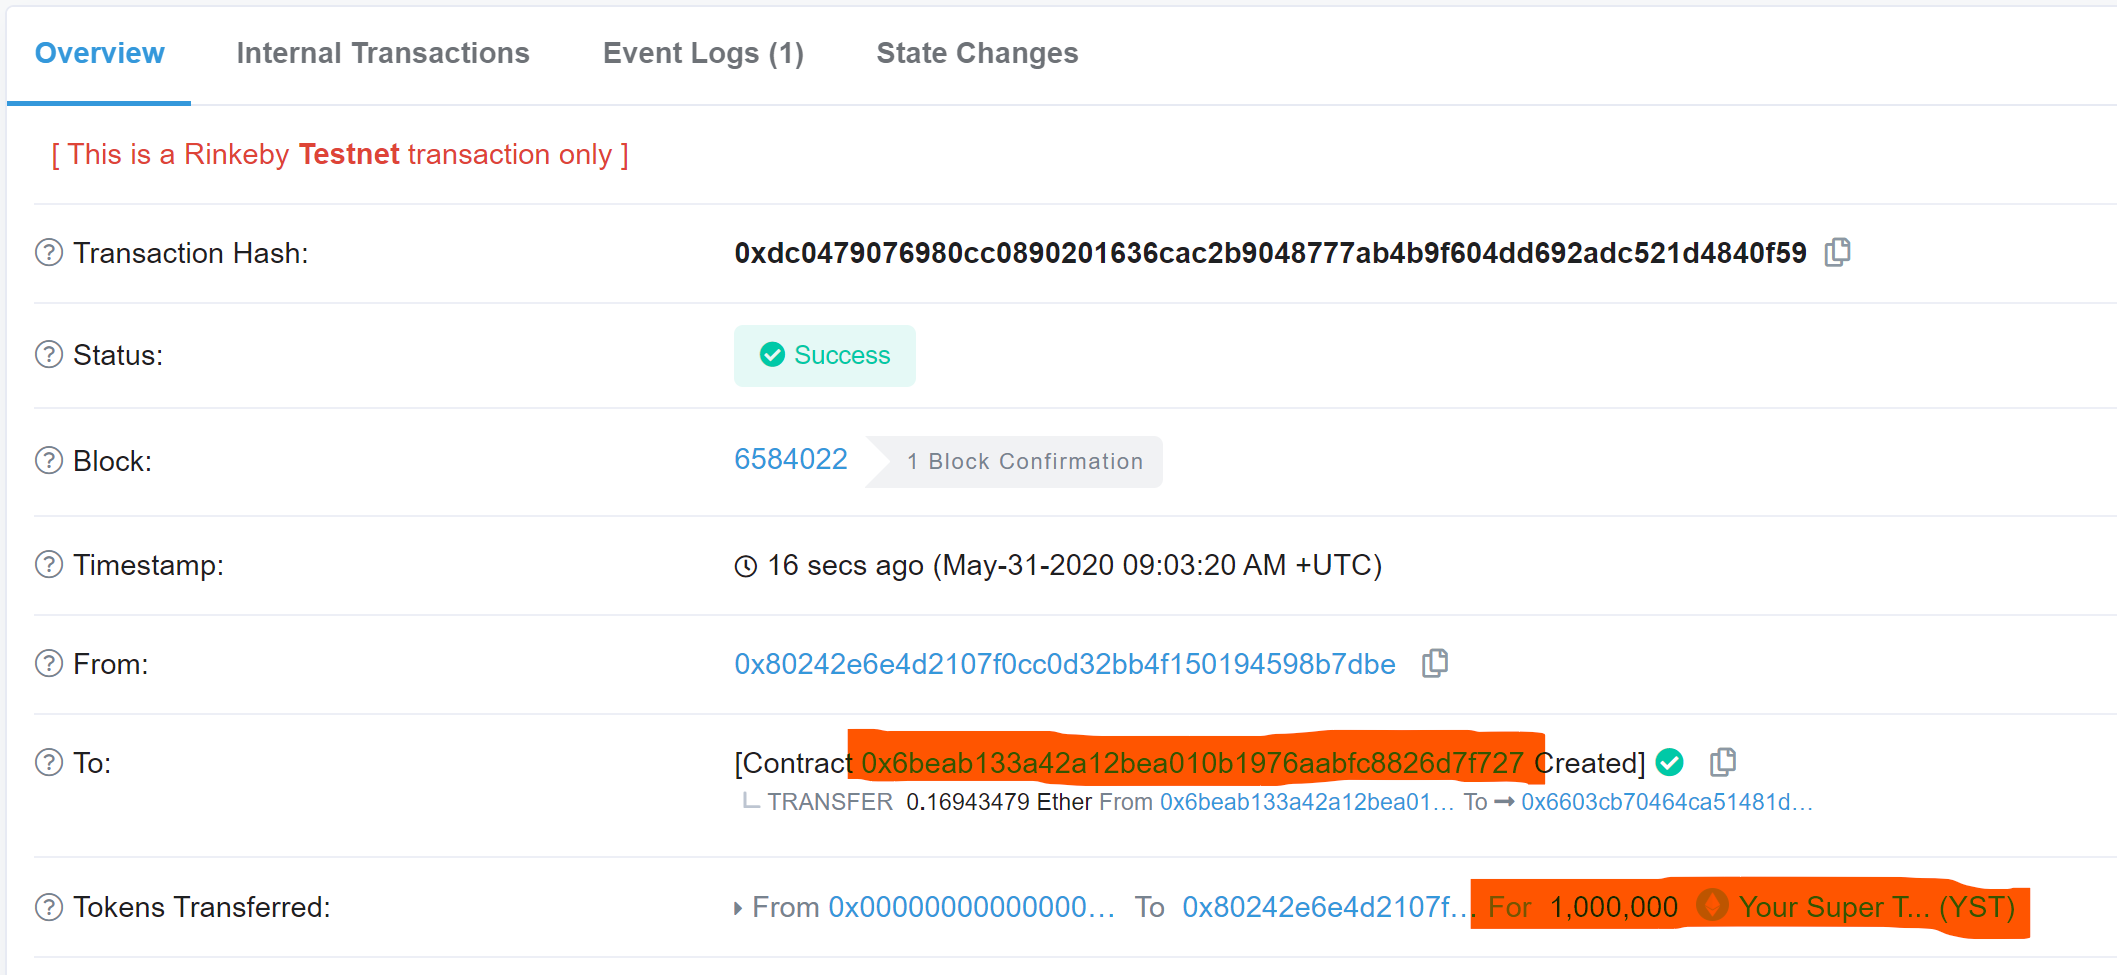
- Etherscan also offers specialized Token details pages by clicking on the Contract address.

This is your ETC-20 Token on Rinkeby. Add it to MetaMask as “Custom Token”.
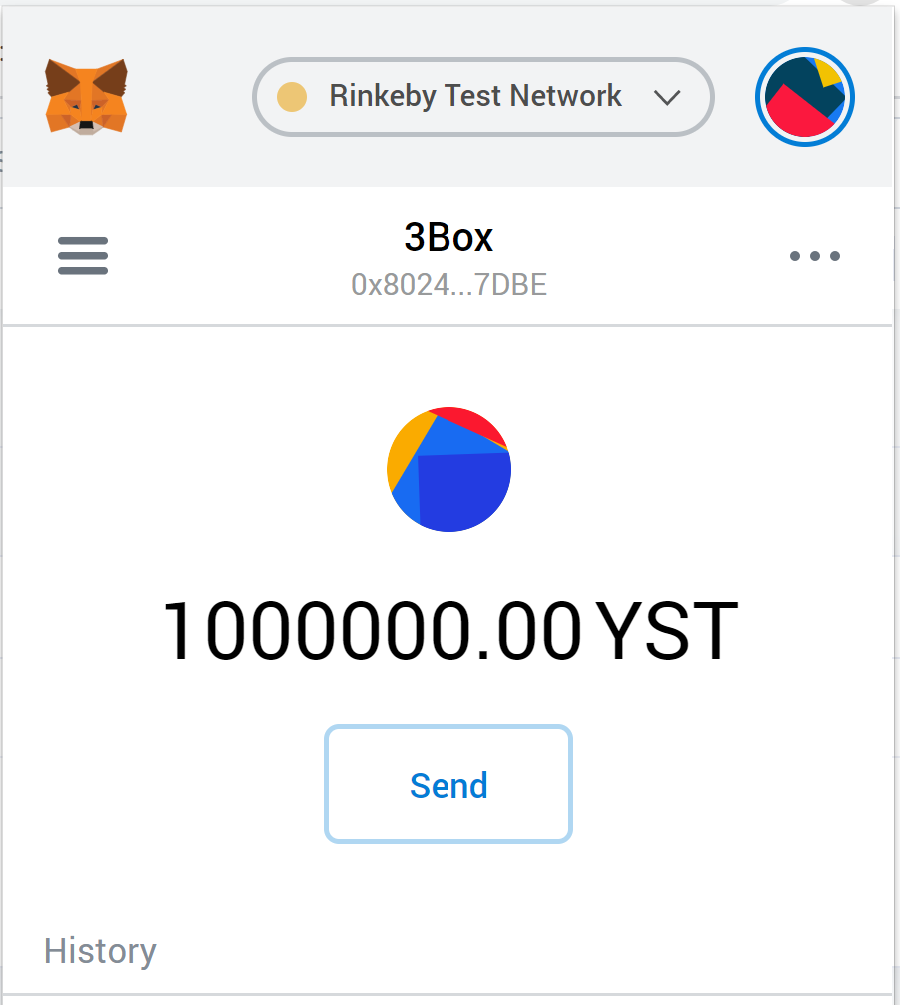
Add the Token contract address, the other attributes should be prefilled correctly. The result should be the amount of 1.000.000 YST Tokens assigned to your wallet address.
Create a liquidity pool on Uniswap v2
How do you sell your YST now? What is a fair price? How can the Token be converted to a Fiat currency?
The easiest solution is to create an auction: people can bid for YST and a price will establish. However, we have a hen and egg problem here: as there is no market at the beginning, there is no order book. Transactions can be manipulated easily and the missing liquidity allows for no realistic market for YST.
The situation is depicted here, there is no market and no possibility to buy and sell our Token for other assets.

Automated Market Maker to the rescue
We will use a Product Fixed Automated Market Maker to solve our problem.
The idea is simple, a Smart Contract calculates a function which makes sure that X*Y=K is true always, with X and Y being the liquidity of the respective Tokens pair in the pool, like DAI/YST.
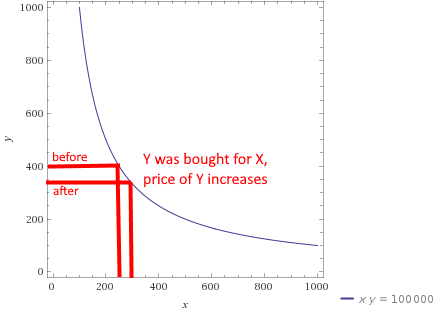
This mechanism is implemented by adjusting the price accordingly by increasing the price of the requested Token with a Smart Contract function.
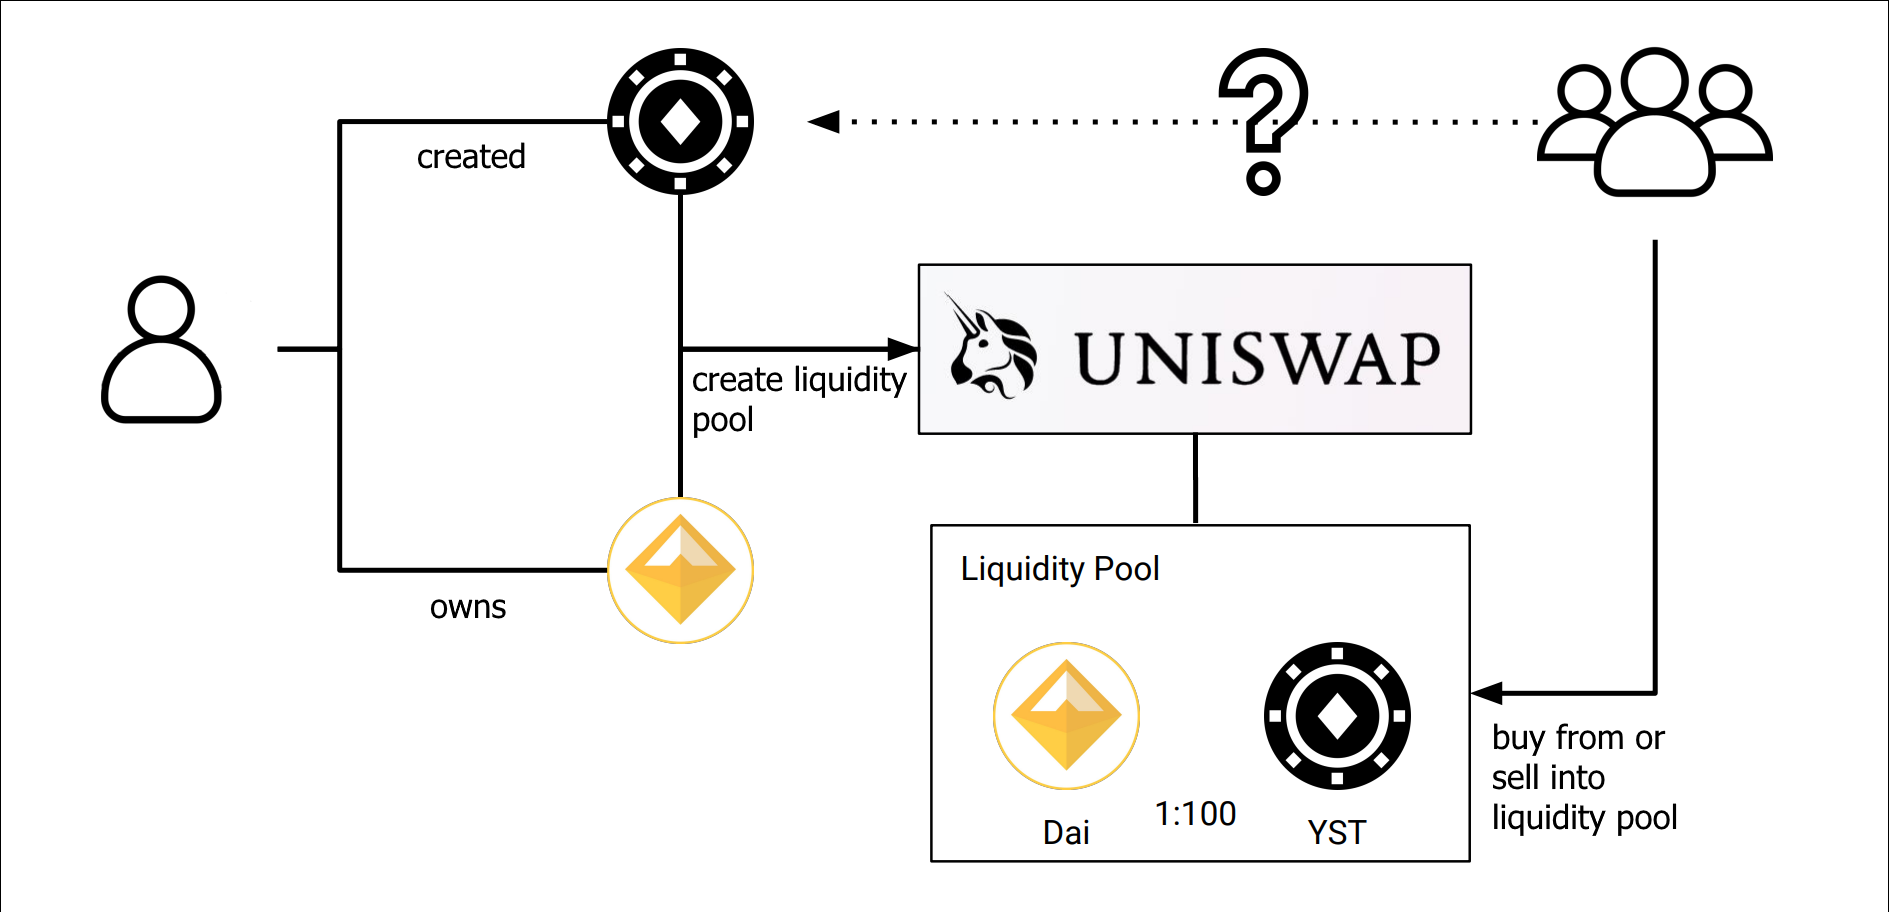
Set the initial price by creating a Liquidity Pool
After creating YST, we can use it to create a liquidity pool by providing the Token and an amount of a already valued Token, eg. stablecoins like DAI. This immediately results in a value for YST, as the Pool Smart Contract now controls the ratio DAI/YST by keeping X*Y=K. With choosing a stablecoin like DAI for the other Token, we are now setting a price in USD for our YST.
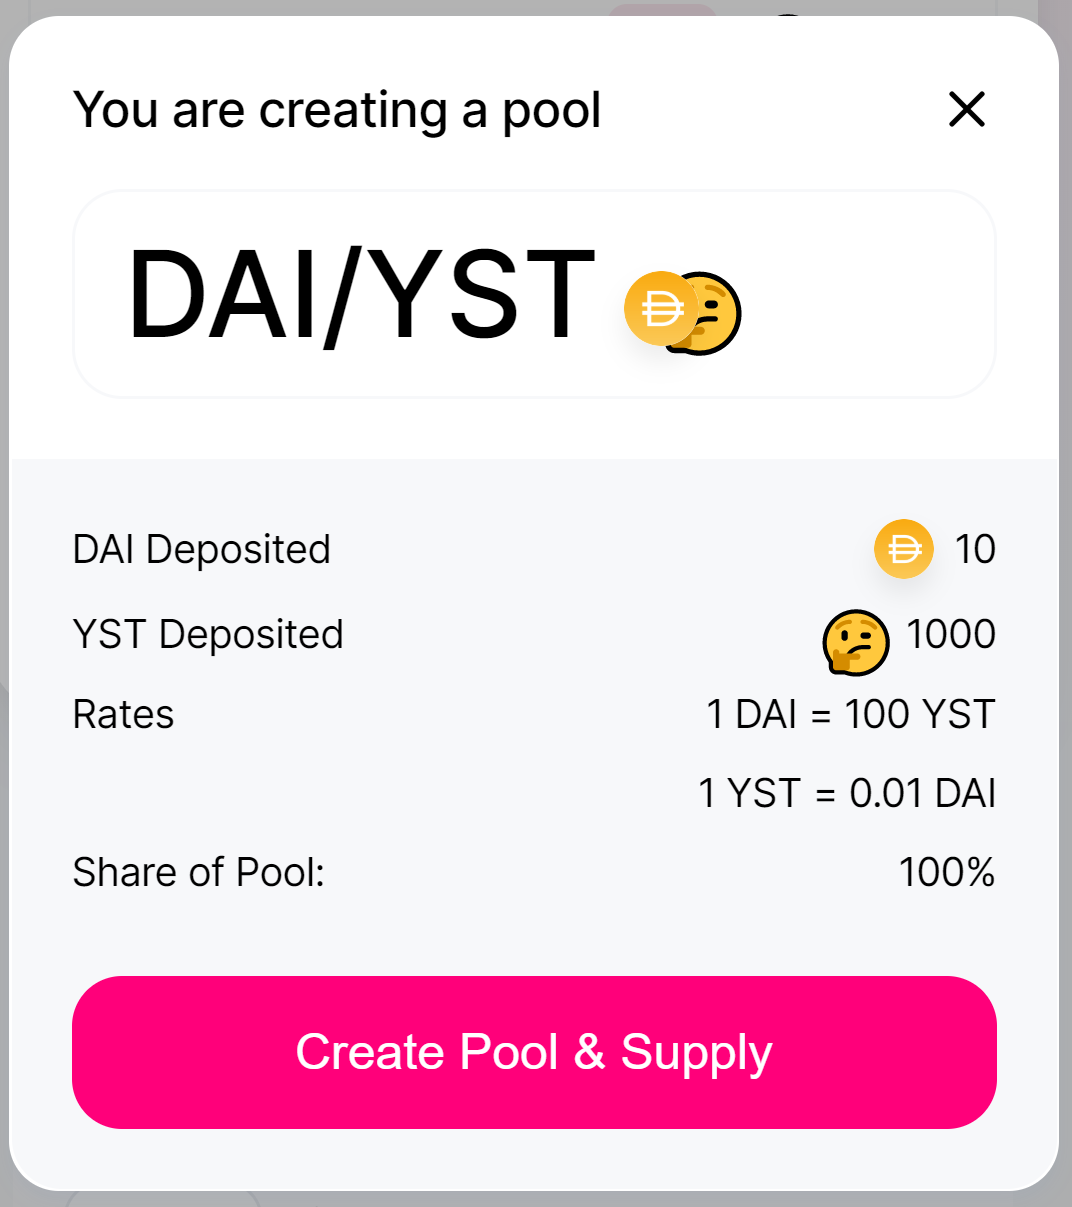
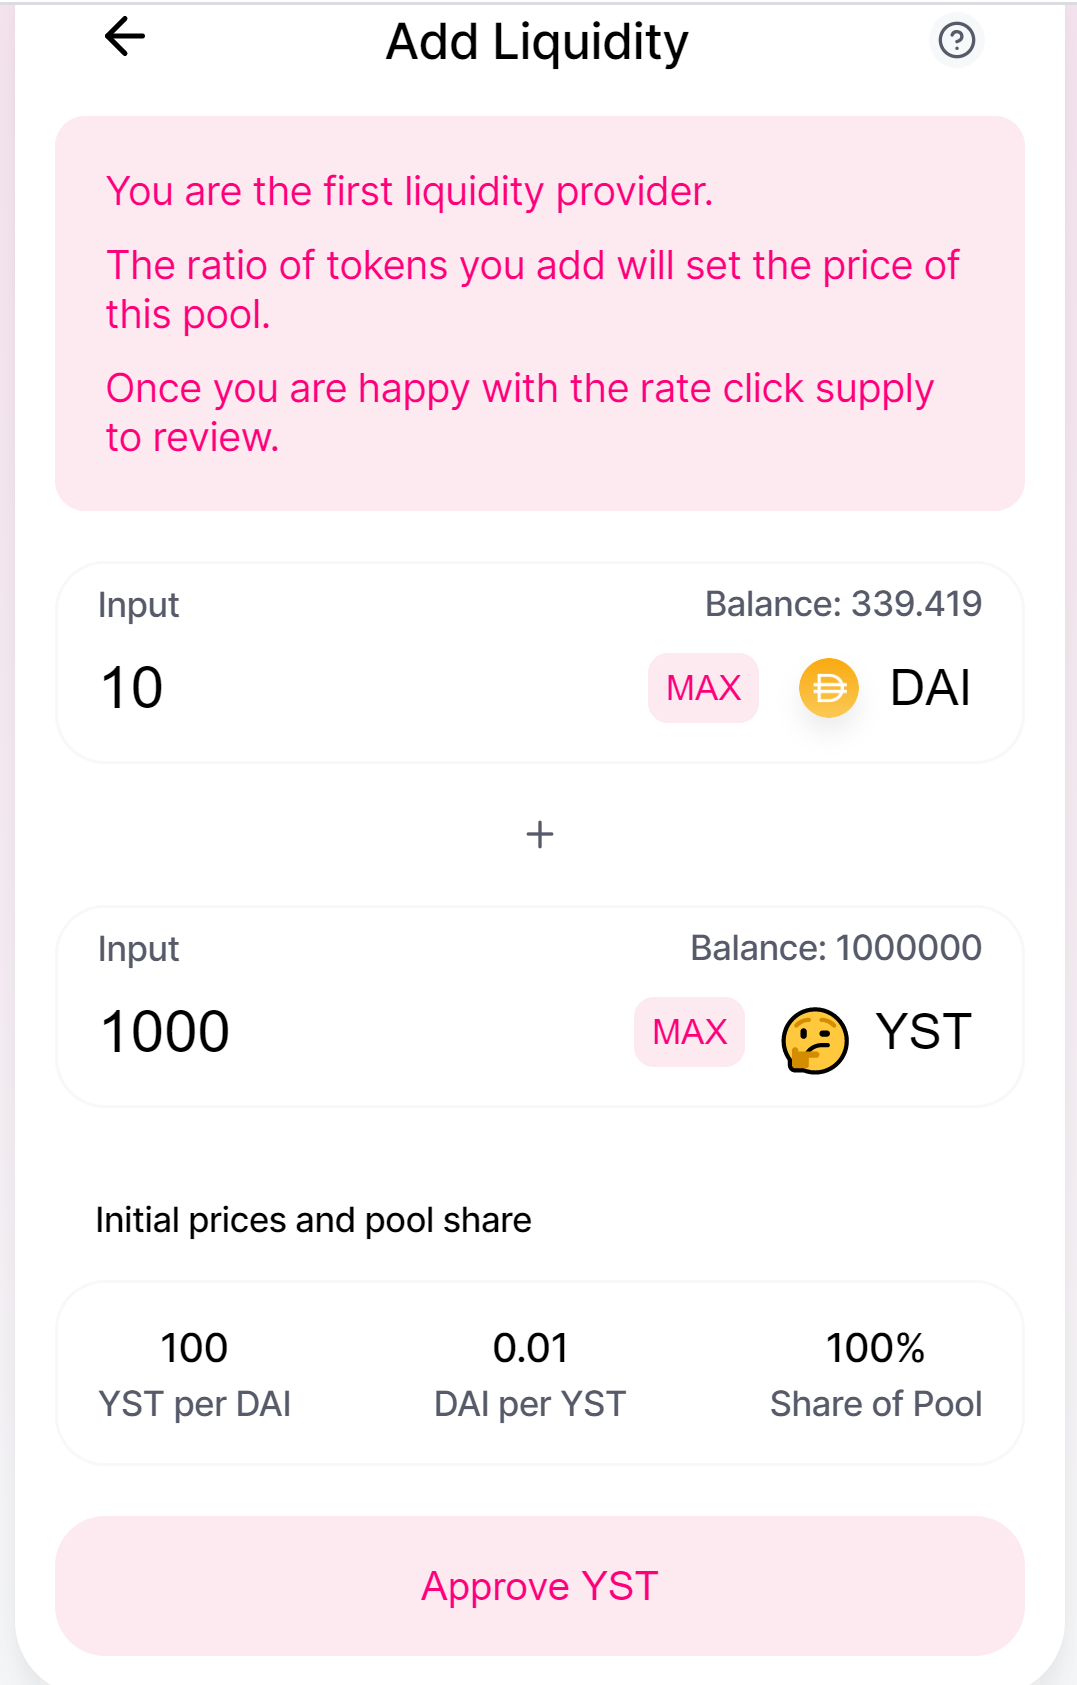
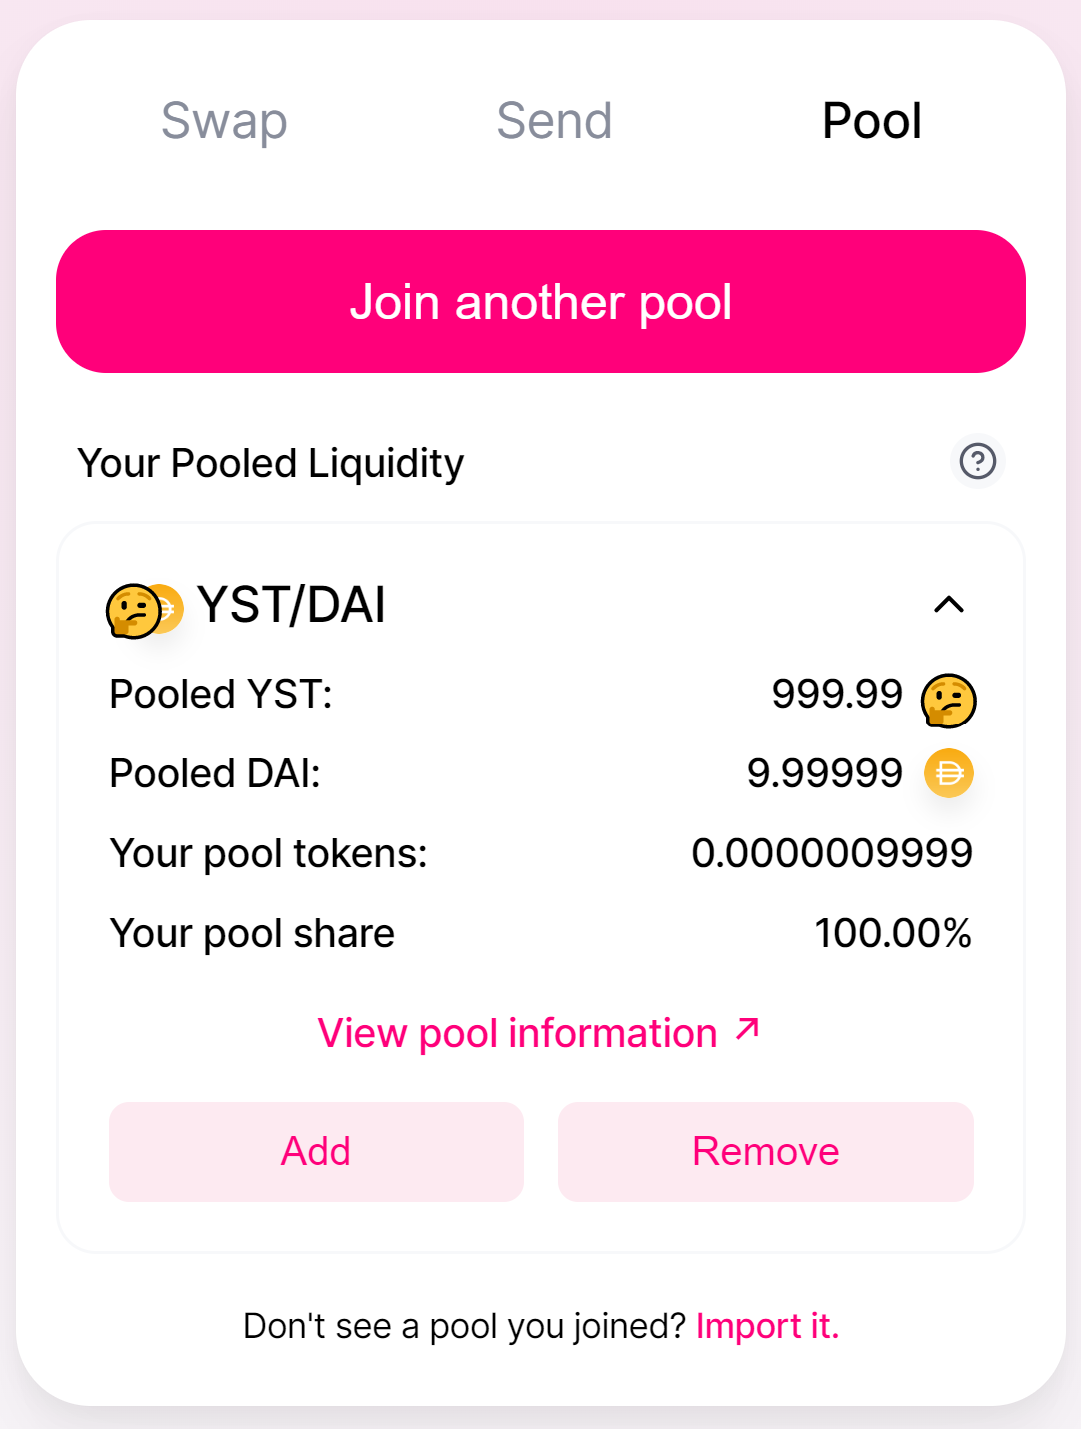
We added 1000 YST and 10 DAI to the pool, resulting in a price of $0.01 of 1 YST. This price is initially set by us with this pool creation. As someone is either buying YST for DAI or DAI for YST, the supply of one Token is reduced and the price is automatically adjusted.
Join an existing Pool
Everyone, globally, without restrictions, can now join an existing pool and trade Tokens. This continuously sets the price for YST.
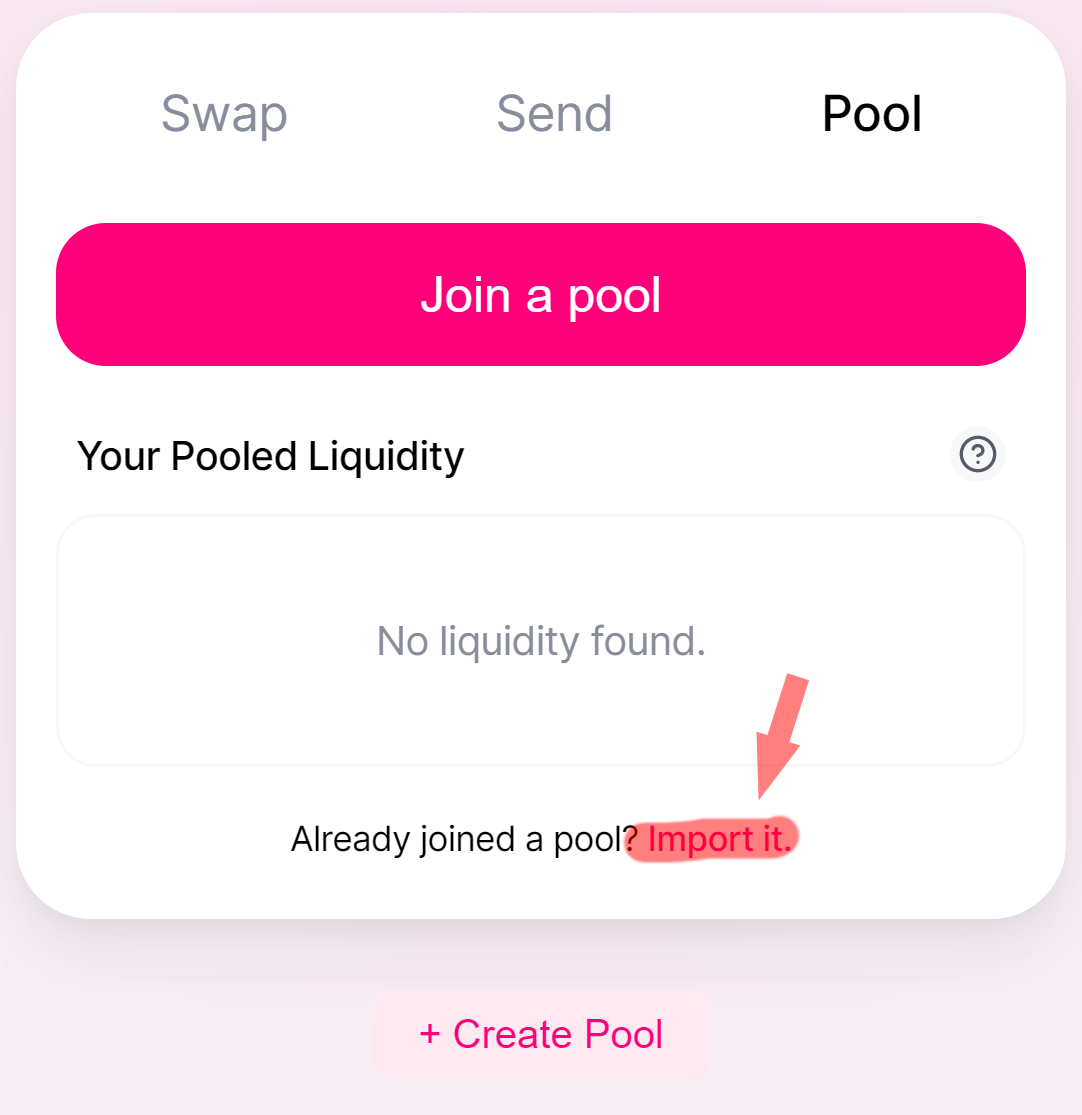
Swap your Tokens
After creation of the liquidity pool, everyone can import and join it and buy/sell YST for DAI. This will reflect in changing prices for those Tokens, depending on the scarcity. The transaction is a “Swap” in Uniswap terms, as a Token is swapped for the other Token of the chose liquidity pool, adjusting the price of both Tokens.
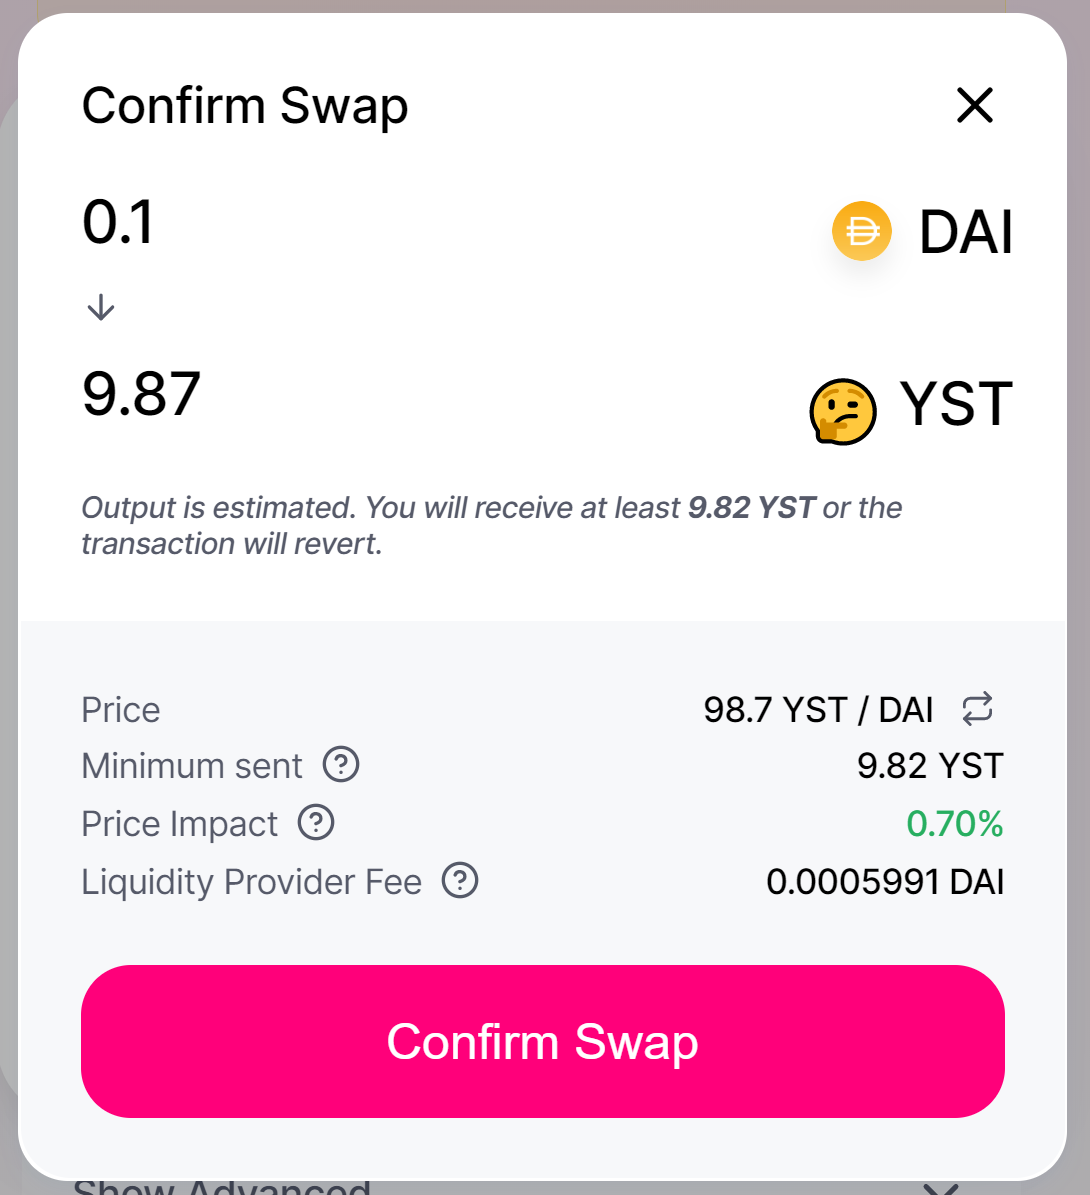
You created your own Token and, by providing a liquidity pool for this Token by adding a stable valued Token, initiated a market for it.
If the prices will rise or fall is now up to the market and the quality of your service.
